/ 04
Customizer
Every option in the Fieldcraft Options panel, section by section — plus the Theme Options admin page, which edits the exact same settings.
Open Appearance → Customize. Every Fieldcraft option lives inside one panel, Fieldcraft Options, split into twelve sections. Color, button-shape, and container-width changes preview live with no reload; the topbar text also updates in the preview pane automatically, via a targeted (selective) refresh of just the announcement strip rather than a full page reload. Every other field (including font pairing, base font size, button style, header style, and section spacing rhythm) applies after you click Publish.
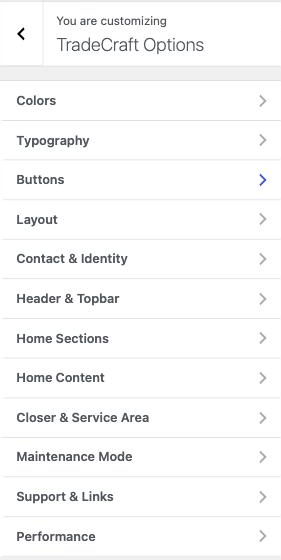
Every setting code listed below carries the fieldcraft_ prefix in actual WordPress code (e.g., fieldcraft_phone_display). The prefix is omitted from the tables below for brevity — use the full name if you're writing code that references theme options.
Fonts, button shape/style, container width, header style and section spacing are all Customizer dropdowns — the same "no code required" promise as the color swatches. Nothing in this panel needs a child theme or a line of CSS. Every option only writes a CSS-variable override when you change it away from its default, so an untouched install renders byte-identical to the live preview, and picking Publish after switching an option back to its default cleanly removes the override.
The Theme Options page (an alternative editing surface)
Everything documented on this page can also be edited without opening the Customizer at all,
from a dedicated admin page: Fieldcraft → Theme Options
(wp-admin/admin.php?page=fieldcraft-options). It has the exact same twelve sections,
as tabs down the left side, and writes the exact same settings the Customizer controls read and
write — there is only one storage location behind both surfaces, so a change made on either
one shows up instantly on the other and on the front end.
- Go to the Fieldcraft menu (top-level in the wp-admin sidebar), then click Theme Options.
- Click a section tab on the left (Colors, Typography, Buttons, Layout, Contact & Identity, Header & Topbar, Home Sections, Home Content, Closer & Service Area, Maintenance Mode, Support & Links, Performance).
- Edit any field directly on the page — color pickers, dropdowns, checkboxes, text fields and the range slider all work the same way they do in the Customizer.
- Click Save Settings at the bottom. You're redirected back to the same tab you were editing, with a “Settings saved” confirmation.
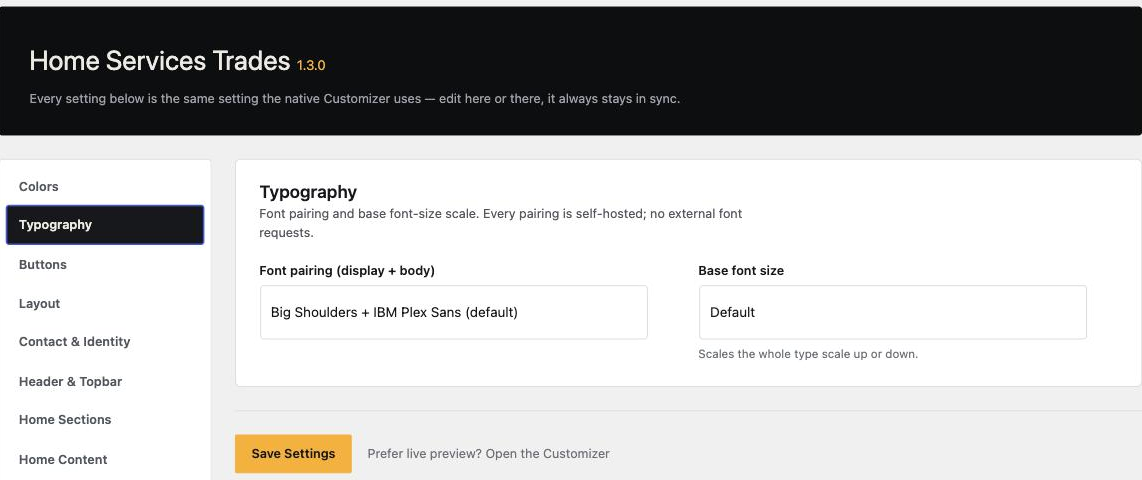
Use the Customizer when you want to see your change against the live site preview before committing to it (colors, container width and button shape redraw instantly as you adjust them). Use the Theme Options page when you already know exactly what you want to change and would rather edit a plain form — it's faster for bulk edits like filling in every Contact & Identity field at once, and there's no separate preview pane to navigate. Both write to the same settings, so you can freely switch between them at any time.
Colors
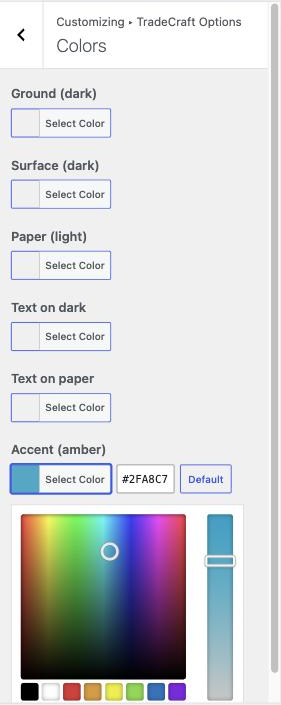
Section: Fieldcraft Options → Colors in the Customizer, or the Colors tab on the Theme Options page. Each swatch is a color picker that maps straight to a CSS custom property, so a change here reflows the whole site instantly in the preview.
- Go to Appearance → Customize → Fieldcraft Options → Colors.
- Click any swatch, e.g. Accent (amber).
- Pick a new color from the picker, or type a hex value — the live preview pane updates instantly, with no reload.
- Click Publish to make the change live on your actual site.
color_iron · CSS var --iron · default #0C0E10. The main dark background.color_iron_2 · CSS var --iron-2 · default #14171C. Raised dark panels/cards.color_paper · CSS var --paper · default #EFE9DF. Light-band backgrounds.color_bone · CSS var --bone · default #EDEAE3.color_ink · CSS var --ink · default #16181C.color_amber · CSS var --amber · default #FFAD0A. The one hot accent — buttons, links, kicker squares.Typography
Section: Fieldcraft Options → Typography. All six pairings are self-hosted
OFL webfonts — picking any of them (including the default) never makes an
external Google Fonts request. The five alternate pairings ship as their own woff2
files and are only loaded on the front end once you actually pick one; a stock install downloads
only the default pairing's fonts.
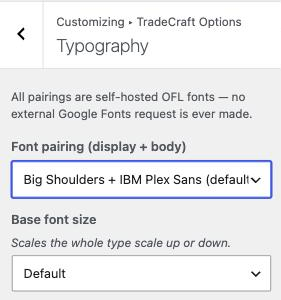
- Go to Appearance → Customize → Fieldcraft Options → Typography.
- Open the Font pairing (display + body) dropdown and choose one of the six curated pairings (see the list below).
- Open the Base font size dropdown if you want to scale the whole type system up or down (Default, Compact or Large).
- Click Publish — these two fields apply after a full preview refresh, not instantly, so you'll see a brief reload before the new fonts appear.
font_pairingDefault big-shoulders (Big Shoulders + IBM Plex Sans). Choose from six curated pairings:
- Big Shoulders + IBM Plex Sans (default)
- Anton + Inter
- Oswald + Roboto
- Bebas Neue + Work Sans
- Archivo Black + Archivo
- Teko + IBM Plex Sans
--fd (display) and --fb (body) CSS variables site-wide. See Credits & Licenses → Fonts for the license of every family.type_scaleDefault default (100%). Scales the whole type system up or down via the --root-size CSS variable — choices are Default (100%), Compact (93.75%) and Large (106.25%).Buttons
Section: Fieldcraft Options → Buttons. Controls the shape and fill of every button site-wide (header CTA, hero buttons, form submits, pattern buttons).
- Go to Appearance → Customize → Fieldcraft Options → Buttons.
- Choose a Button shape — Square (default), Rounded or Pill. This one redraws live as you pick.
- Choose a Button style — Fill (solid accent-color button) or Outline (transparent with a border). Click Publish to see this one, since it applies on refresh.
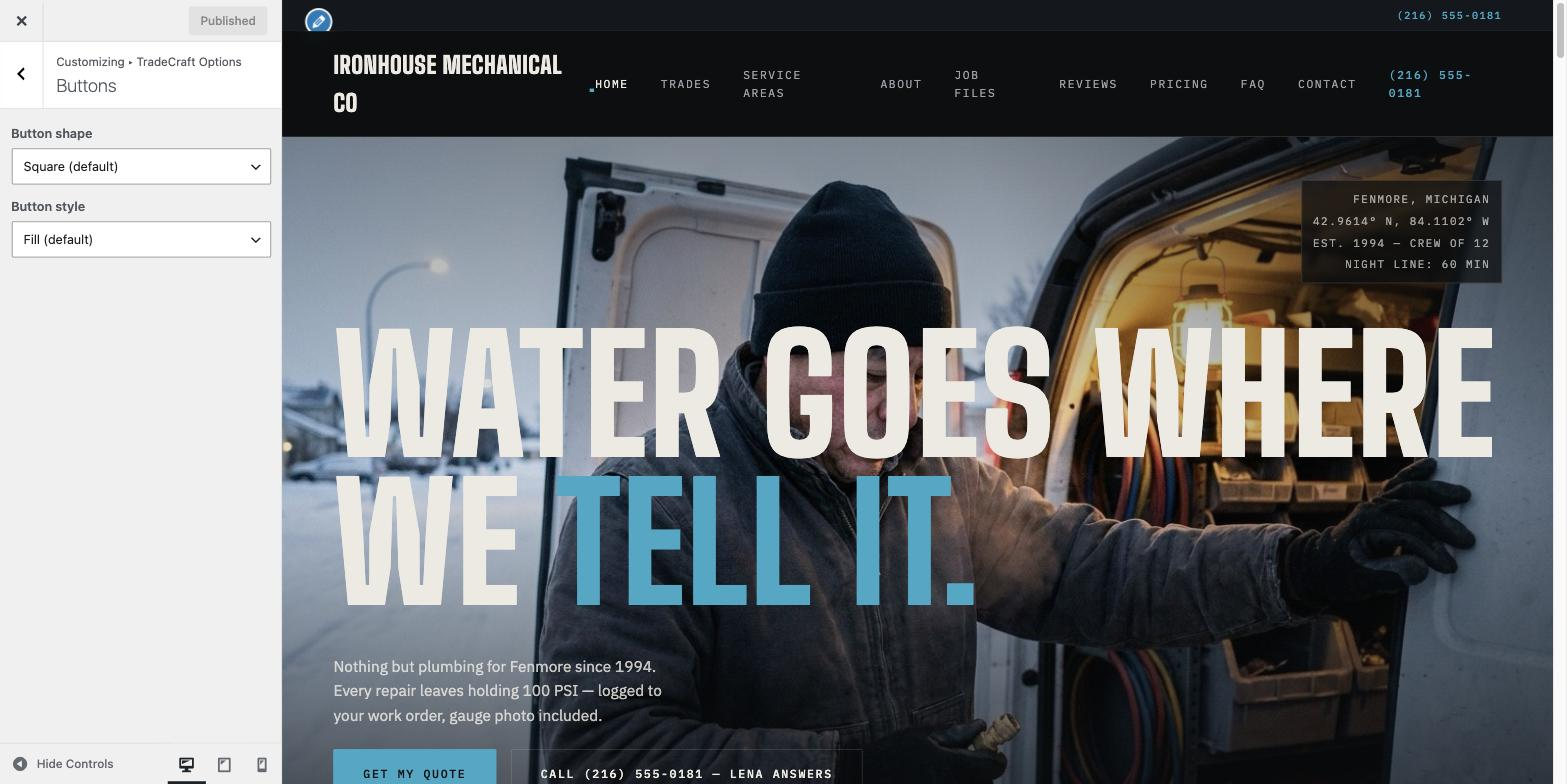
button_shapeDefault square. Choices: Square (default, sharp corners), Rounded, Pill. Maps to the --btn-radius CSS variable.button_styleDefault fill (solid accent-color button). Choices: Fill (default) or Outline (transparent with a border, accent-color text).Layout
Section: Fieldcraft Options → Layout. Site-wide structural controls — none of them touch content, only how wide, how tall and how the header sits.
- Go to Appearance → Customize → Fieldcraft Options → Layout.
- Choose a Container max-width — Standard (1440px), Wide (1600px) or Full width. This one redraws live.
- Choose a Header style — Solid (default) or Transparent (overlays the header on the hero image on the front page only, until the visitor scrolls). Click Publish to see this one.
- Choose a Section spacing rhythm — Default, Compact or Roomy. This one also redraws live.
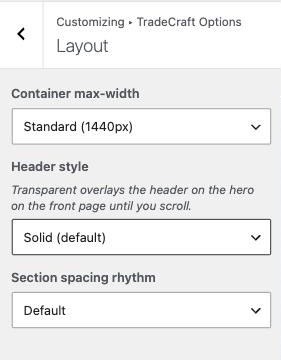
container_widthDefault standard (1440px). Choices: Standard (1440px, default), Wide (1600px), Full width (100%). Maps to the --container-content CSS variable that bounds every section's content width.header_styleDefault solid (sticky scrim header on every page). Choice transparent overlays the header on the hero image on the front page only, until the visitor scrolls — on every other page the header is always solid.section_rhythmDefault default. Choices: Default, Compact (tighter vertical spacing between sections), Roomy (looser vertical spacing). Maps to the --section-y CSS variable used by every section's top/bottom padding.Contact & Identity
Section: Fieldcraft Options → Contact & Identity. Every field here is plain text — there is no live preview, so changes appear after you click Publish (or Save Settings on the Theme Options page).
- Go to Appearance → Customize → Fieldcraft Options → Contact & Identity (or Fieldcraft → Theme Options → Contact & Identity).
- Replace Phone (display) with your real business number — this also becomes the number the header/footer “Call” buttons actually dial (the
tel:link is generated from this field automatically; there's no separate field to keep in sync). - Fill in Contact email, Address, Hours and your real License / insurance line before launch — the shipped defaults are demo placeholders.
- Click Publish (Customizer) or Save Settings (Theme Options page).
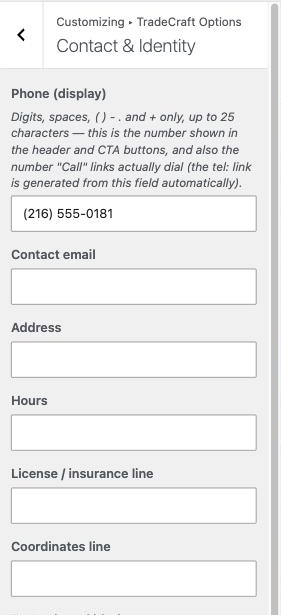
phone_display · default (216) 555-0181. The human-readable phone shown in the header and footer. The tel: click-to-call link is auto-derived from this value — only the digits (and a leading +, if present) are extracted and used, so there is no separate tel: link field; they are always kept in sync.footer_email · default dispatch@ironhousemech.example.footer_address · default 214 Foundry Row, Winslow, OH.footer_hours · default Office Mon–Sat 7:00–17:00.footer_license · default OH LIC #M-41172 · INSURED TO $2,000,000. Replace with your own real license number before launch.footer_coords · default 41.0308° N, 81.5217° W. Cosmetic mono detail in the footer.footer_blurb · empty by default (falls back to the theme's built-in default copy). Add your own one-line footer description to override it.Header & Topbar
Section: Fieldcraft Options → Header & Topbar.
- Go to Appearance → Customize → Fieldcraft Options → Header & Topbar.
- To show a shorter brand name in the header logo than your full Site Title, type it into Header wordmark — leave it empty to fall back to Settings → General → Site Title.
- Tick or untick Show announcement topbar to toggle the thin strip above the header.
- Edit Topbar announcement text — watch the preview pane's topbar update as you type, via a targeted refresh of just that strip.
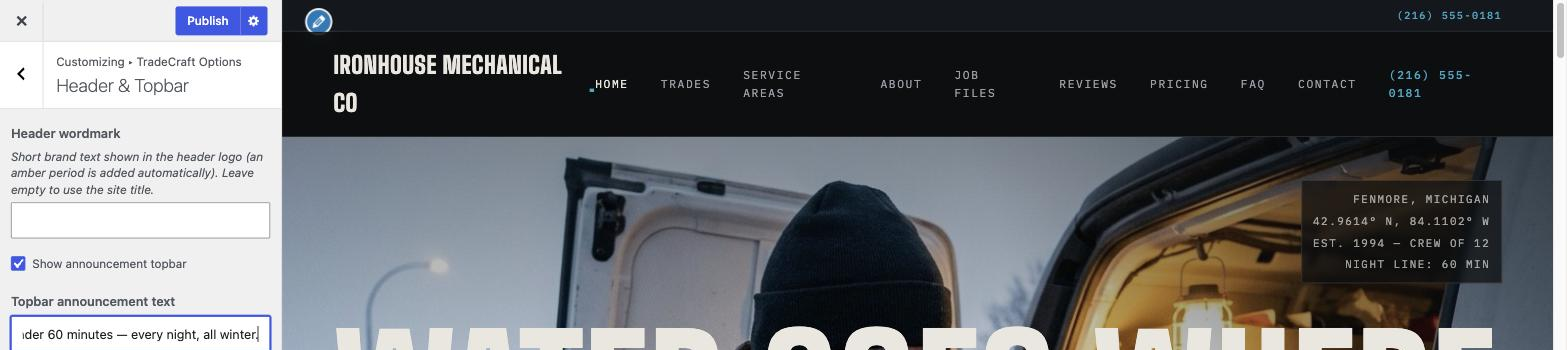
wordmarkSetting wordmark · empty by default, which falls back to your Site Title (Settings → General). The header logo always appends its own amber accent period automatically, so if your text (or site title) already ends in a period — e.g. “Ironhouse Mechanical Co.” — that trailing period is stripped first to avoid showing two in a row. Use this field when you want the header logo to show a shorter brand name than your full site title (only applies while no custom logo image is set — see Site Setup → Logo).show_topbar · default on. Toggles the thin announcement strip above the header.topbar_text · default NIGHT LINE STAFFED — MEDIAN DOOR-TIME 47 MIN. Updates in the preview pane automatically as you edit, using WordPress's selective (partial) refresh — only the announcement strip itself redraws, not the whole preview pane, so there's no full-page reload.Home Sections
Section: Fieldcraft Options → Home Sections. Every checkbox defaults to on. Turning one off removes that band from the front page entirely (only when the front page is rendering the demo composition; see Site Setup → Front page setup).
- Go to Appearance → Customize → Fieldcraft Options → Home Sections.
- Untick any section you don't want on your home page — for example, untick Team band if you don't have crew photos yet.
- Click Publish — the section disappears from your live front page.
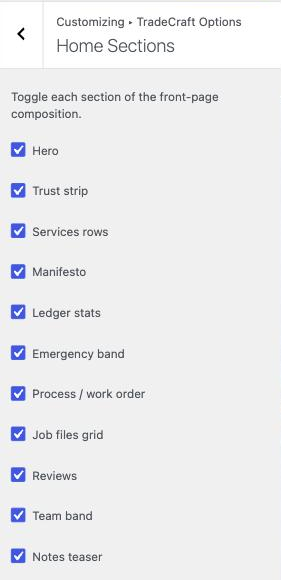
home_show_heroThe full-bleed opening hero band.home_show_trustMono credentials/license strip.home_show_servicesNumbered trade rows.home_show_manifestoThe brand's house-rules statement band.home_show_ledgerCount-up operational stats.home_show_emergencyAmber call-to-action band with the phone number.home_show_processThe step-by-step "how a job runs" section.home_show_jobsBefore/after job-file photo grid.home_show_reviewsCustomer review excerpts.home_show_teamCrew photo band.home_show_notesLatest blog posts teaser.Home Content
Section: Fieldcraft Options → Home Content. The most-edited front-page copy, surfaced as direct Customizer fields so you don't have to touch a demo-import file to change them. Every other front-page string is theme-mod / demo-import driven only — it's set by whichever demo you import (see Demo Content) and isn't exposed as its own Customizer field. Leave any field below empty to keep the flagship (Ironhouse) default.
- Go to Appearance → Customize → Fieldcraft Options → Home Content.
- Type your own copy into any field — for example, replace Services heading with your own headline. Fields marked “HTML allowed” accept a
<br>for a manual line break and<em>for the italic accent word. - To change the three animated count-up numbers in the Ledger stats band, edit Ledger — stat 1/2/3 number — digits only, Fieldcraft adds the comma grouping and count-up animation automatically.
- Click Publish.
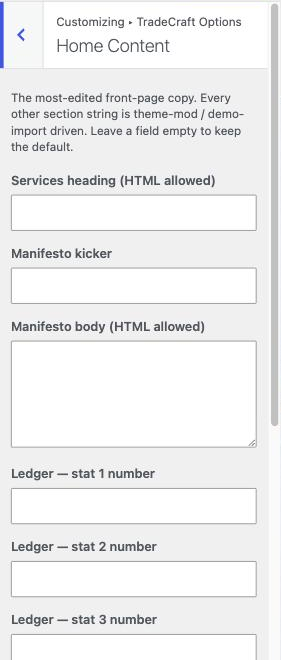
services_headingDefault Five ways a<br>house <em>breaks.</em>. Heading above the numbered trade rows.manifesto_kickerDefault THE HOUSE RULES. Small mono label above the manifesto heading.manifesto_bodyDefault the brand's house-rules statement paragraph. The main copy block of the Manifesto band.ledger_stat_1_numDefault 31406. Digits only — rendered with comma grouping (31,406) and used as the count-up target for "Work orders since 1987."ledger_stat_2_numDefault 412. Digits only — count-up target for "Parts on every truck."ledger_stat_3_numDefault 47. Digits only — count-up target for "Median night response, minutes."emergency_kickerDefault NO HEAT? WATER RISING? BREAKER WON'T HOLD?. Small mono label above the Emergency band heading.emergency_headingDefault It's never<br><em>a machine.</em>.emergency_supportDefault the "night line is Rennie Park" paragraph under the Emergency band heading. The phone number itself is a separate field — see Contact & Identity.reviews_headingDefault Word gets<br><em>around.</em>.team_headingDefault You'll know<br>who's <em>knocking.</em>.Closer & Service Area
Section: Fieldcraft Options → Closer & Service Area. These two toggles control the pair of bands that repeat near the bottom of every inner page (not just the home page).
- Go to Appearance → Customize → Fieldcraft Options → Closer & Service Area.
- Untick Show the quote-form band site-wide or Show the service-area ring strip site-wide to hide either band everywhere it repeats.
- Replace Service-area towns with your own comma-separated list of towns you actually service.
- Click Publish.
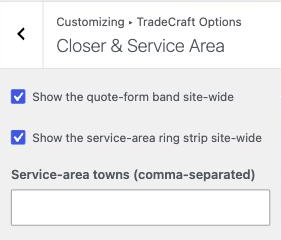
show_closerThe "Tell us what broke" quote-form band that appears near the bottom of inner pages.show_ringThe mono service-area towns strip.ring_townsDefault Winslow, Harlan Township, Bell Creek, Dunmore, Ostrander Falls. Replace with your own service-area towns.Maintenance Mode
Section: Fieldcraft Options → Maintenance Mode. Shows a coming-soon page to logged-out visitors while you finish setup — logged-in users who can edit theme options always see the real site, so you can keep working behind the gate.
- Go to Appearance → Customize → Fieldcraft Options → Maintenance Mode.
- Edit the Heading and Message fields to say whatever you'd like visitors to see.
- Tick Enable maintenance / coming-soon mode when you're ready to gate the site — log out or open a private/incognito window to confirm what logged-out visitors see.
- Click Publish. Untick the same checkbox and publish again whenever you're ready to go live.
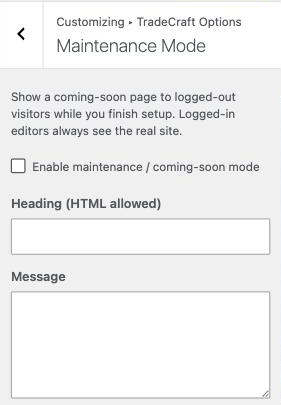
maintenance_modeDefault off. When on, every front-end request from a logged-out visitor is served the coming-soon template instead of the real site (wp-admin, login, AJAX, REST and feeds are never gated).maintenance_headingDefault The site’s on<br><em>the bench.</em>. Basic HTML (line breaks, emphasis) is allowed and kept safe with wp_kses_post.maintenance_messageDefault We rebuild this the way we rebuild anything — quoted, scheduled, done once. The phone works the whole time.Support & Links
Section: Fieldcraft Options → Support & Links. The URLs used by the "Read the docs", "Get support" and "Follow" buttons on the theme dashboard (the Fieldcraft admin menu, top-level in the wp-admin sidebar) — point these at your own hosted docs, support channel or profile if you're rebranding the theme for a client.
- Go to Appearance → Customize → Fieldcraft Options → Support & Links.
- Replace Documentation URL, Support URL and/or Follow-us URL with your own destinations.
- Click Publish — the Fieldcraft dashboard's Welcome page buttons update immediately.
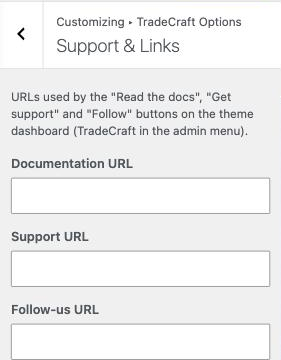
documentation_urlDefault points at the hosted Fieldcraft docs. Powers the dashboard's "Read the docs" button.support_urlDefault points at the hosted docs' FAQ (which answers "Where do I get support?"). Powers the dashboard's "Get support" button.social_urlDefault points at the ThemeForest author profile. Powers the dashboard's "Follow" button.Performance
Section: Fieldcraft Options → Performance. Six optional weight-trimming and
font-tuning controls. The four checkbox toggles default off (so the theme behaves exactly like core
WordPress until you opt in), except perf_preload_fonts which defaults on.
- Go to Appearance → Customize → Fieldcraft Options → Performance.
- Tick Disable WordPress emoji script/styles, Disable jQuery Migrate and/or Disable the oEmbed front-end script if you don't need them — check your other active plugins first (see the callout below).
- Drag the JPEG compression quality slider if you want smaller image files (lower number) or higher fidelity (higher number).
- Click Publish.
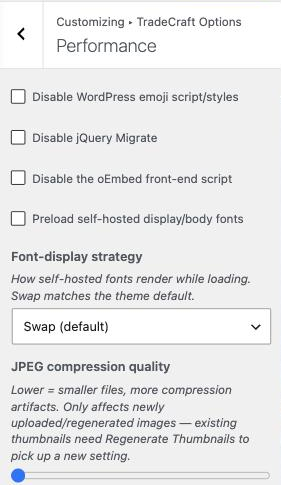
perf_disable_emojiSetting perf_disable_emoji · default off. Dequeues core's wp-emoji-release.min.js and its inline styles on the front end. Leave off if you rely on native emoji rendering for older browsers.perf_disable_jquery_migrateSetting perf_disable_jquery_migrate · default off. Removes the jquery-migrate dependency from core's bundled jQuery. Only enable this if you've confirmed no plugin on your site depends on jQuery Migrate.perf_disable_oembedSetting perf_disable_oembed · default off. Removes WordPress's oEmbed front-end script if you don't embed remote content (tweets, videos, etc.).perf_preload_fontsSetting perf_preload_fonts · default on. Adds <link rel="preload"> tags for the active font pairing's WOFF2 files in the document head, speeding up initial text rendering. Safe to leave on; only disable if another plugin already preloads fonts or if preloading causes issues with your chosen font pairing.perf_font_displaySetting perf_font_display · default swap. Controls how self-hosted fonts render while loading (via CSS font-display property). Choices: Swap (default, show fallback immediately then swap in real font), Auto, Block, Fallback, Optional. Swap matches the theme default and is recommended for most sites.perf_jpeg_qualitySetting perf_jpeg_quality · default 82. Sets the quality level (0–100) for newly uploaded or regenerated JPEG images. Lower values = smaller files but more compression artifacts. Note: This only affects images uploaded or regenerated after you change this setting; existing thumbnails require the Regenerate Thumbnails plugin to pick up the new quality level.Colors (and the site title/tagline) redraw instantly in the Customizer preview pane as you pick/type — no reload, no save required to see them. The topbar text updates via a selective (partial) refresh — only the announcement strip itself redraws, still with no full-page reload. Every other field (contact details, toggles, service-area towns) instead triggers an automatic full refresh of the preview pane once you change the field, so you still see your change without saving — it just isn't an instant redraw. Either way, click Publish to make the change live on your actual site. On the Theme Options page, every field applies only after you click Save Settings — there is no live preview pane on that surface.